Training a PyTorch Net with GPUs
In this tutorial you will learn how to install and use PyTorch through Anaconda, and how to train an image classifier using the GPUs available on Kay.
Installing PyTorch
The first step is to download and install PyTorch. This is done via Anaconda, which is available on Kay. Log in to Kay, and enter
-bash-4.2$ module load conda/2
For the purpose of this tutorial we will use the path
/ichec/work/project/
as our installation path, although obviously you will have to change this to your own location.
Let us set up a new conda environment using Python 3.7 as follows:
-bash-4.2$ mkdir /ichec/work/project/py37
-bash-4.2$ conda create --prefix /ichec/work/project/py37 python=3.7
After this is done, every time we need to use this environment we enter:
-bash-4.2$ source activate /ichec/work/project/py37
Notice that the prompt will change to
(py37) -bash-4.2$
That is our environment set up. Now we install PyTorch under this environment. There is a catch, however. We need to install the GPU-enabled version of PyTorch. Actually we are going to install three GPU-enabled libraries - torch, torchvision and torchaudio. First we must download the offline installers for our chosen python version (3.7):
(py37) -bash-4.2$ wget https://download.pytorch.org/whl/cu111/torchvision-0.9.1%2Bcu111-cp37-cp37m-linux_x86_64.whl
(py37) -bash-4.2$ wget https://download.pytorch.org/whl/cu111/torch-1.8.1%2Bcu111-cp37-cp37m-linux_x86_64.whl
(py37) -bash-4.2$ wget https://download.pytorch.org/whl/torchaudio-0.8.1-cp37-cp37m-linux_x86_64.whl
It is then very easy to install these into our py37 environment as follows:
(py37) -bash-4.2$ pip install torch-1.8.1+cu111-cp37-cp37m-linux_x86_64.whl
(py37) -bash-4.2$ pip install torchvision-0.9.1+cu111-cp37-cp37m-linux_x86_64.whl
(py37) -bash-4.2$ pip install torchaudio-0.8.1-cp37-cp37m-linux_x86_64.whl
Each of these lines will take a minute or so to complete. Once that is done we are ready to create and train our image classifier.
Creating a PyTorch Image Classifier
The content below is partially based on the PyTorch documentation.
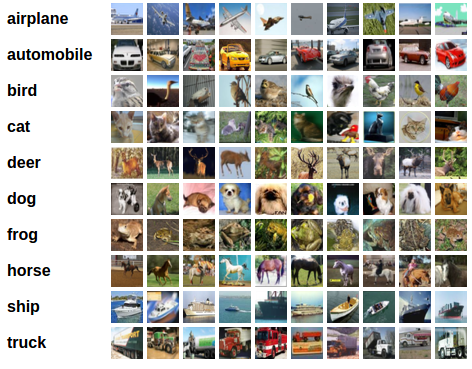
The idea of this tutorial is to classify images from the CIFAR10 dataset which consists of thousands of stock images in the following categories:
The script we will use downloads the dataset only if necessary. It checks if the dataset is in place, if so it does not download it again.
We present the following script and discuss it briefly:
import sys
import torch
import torchvision
import torchvision.transforms as transforms
import torch.nn as nn
import torch.nn.functional as F
import torch.optim as optim
from datetime import datetime

transform = transforms.Compose(
    [transforms.ToTensor(),
     transforms.Normalize((0.5, 0.5, 0.5), (0.5, 0.5, 0.5))])

trainset = torchvision.datasets.CIFAR10(root='./data', train=True, download=True, transform=transform)
trainloader = torch.utils.data.DataLoader(trainset, batch_size=4, shuffle=True, num_workers=2)

testset = torchvision.datasets.CIFAR10(root='./data', train=False,download=True, transform=transform)
testloader = torch.utils.data.DataLoader(testset, batch_size=4, shuffle=False, num_workers=2)

classes = ('plane', 'car', 'bird', 'cat', 'deer', 'dog', 'frog', 'horse', 'ship', 'truck')

class Net(nn.Module):
    def __init__(self):
        super(Net, self).__init__()
        self.conv1 = nn.Conv2d(3, 6, 5)
        self.pool = nn.MaxPool2d(2, 2)
        self.conv2 = nn.Conv2d(6, 16, 5)
        self.fc1 = nn.Linear(16 * 5 * 5, 120)
        self.fc2 = nn.Linear(120, 84)
        self.fc3 = nn.Linear(84, 10)
    def forward(self, x):
        x = self.pool(F.relu(self.conv1(x)))
        x = self.pool(F.relu(self.conv2(x)))
        x = x.view(-1, 16 * 5 * 5)
        x = F.relu(self.fc1(x))
        x = F.relu(self.fc2(x))
        x = self.fc3(x)
        return x

model = Net()

# Display whether cuda detected
havegpu = torch.cuda.is_available()
print("CUDA detected:", havegpu)

# Display number of gpus available
print("There are ", torch.cuda.device_count(), "GPUs available.")

# The following line sets multiple gpus if available
if havegpu:
    model = nn.DataParallel(model).cuda()
    criterion = nn.CrossEntropyLoss().cuda()
else:
    model = nn.DataParallel(model)
    criterion = nn.CrossEntropyLoss()

optimizer = optim.SGD(model.parameters(), lr=0.001, momentum=0.9)

print(datetime.utcnow())
print('Starting training...')

# Train the network
for epoch in range(5):  # loop over the dataset multiple times
    running_loss = 0.0
    for i, data in enumerate(trainloader, 0):
        # get the inputs; data is a list of [inputs, labels]
        inputs, labels = data
        # zero the parameter gradients
        optimizer.zero_grad()
        # forward + backward + optimize
        if havegpu:
            outputs = model(inputs).cuda()
            loss = criterion(outputs, labels.cuda())
        else:
            outputs = model(inputs)
            loss = criterion(outputs, labels)

        loss.backward()
        optimizer.step()
        # print statistics
        running_loss += loss.item()
        if i % 2000 == 1999:    # print every 2000 mini-batches
            print('[%d, %5d] loss: %.3f' %
               (epoch + 1, i + 1, running_loss / 2000))
            running_loss = 0.0

print('Finished training!')
print(datetime.utcnow())

PATH = './cifar_net_'+sys.argv[1]+'.pth'
torch.save(model.state_dict(), PATH)
We name the above script train.py. We can create two sbatch scripts, the first to submit to the ProdQ, and the second for GpuQ. The GpuQ file might look as follows:
#!/bin/sh
#SBATCH -p GpuQ
#SBATCH -N 1
#SBATCH -t 00:30:00
#SBATCH -A account

cd $SLURM_SUBMIT_DIR

module load cuda/11.2
module load conda/2

source activate /ichec/work/project/py37

echo "This is the GpuQ run."
time python train.py
Notice how pytorch functionality is utilised entirely through python, by importing appropriate libraries. Also note it is very important to load the cuda/11.2 module as this loads the gpu driver. Without this the script will fail with an error.
It is possible to compare the run time between the standard run in the ProdQ and the GPU-enabled run in the GpuQ. The script prints the current date/time before and after training. A sample run shows that the ProdQ run takes over an hour, whereas the GpuQ run takes 6 minutes and 12 seconds. Be aware however that this is a fairly small example - the advantage of one or two GPUs will grow as the size of the dataset/number of epochs increases.
One last note - there is no internet access on the compute nodes, so you will need to download the CIFAR10 data on the login node. You are allowed to do this. Just activate your environment, and run python 3.7 (just type python - enter). Then run the following snippet of the main script:
import sys
import torch
import torchvision
import torchvision.transforms as transforms
import torch.nn as nn
import torch.nn.functional as F
import torch.optim as optim
from datetime import datetime

transform = transforms.Compose(
    [transforms.ToTensor(),
     transforms.Normalize((0.5, 0.5, 0.5), (0.5, 0.5, 0.5))])

trainset = torchvision.datasets.CIFAR10(root='./data', train=True, download=True, transform=transform)
trainloader = torch.utils.data.DataLoader(trainset, batch_size=4, shuffle=True, num_workers=2)

testset = torchvision.datasets.CIFAR10(root='./data', train=False,download=True, transform=transform)
testloader = torch.utils.data.DataLoader(testset, batch_size=4, shuffle=False, num_workers=2)
Then when the main job runs the data will be there, ready to use.